Making my first game - Portcullis (Part 2)
If you haven’t yet, please read Part 1.
Hello, again!
A week has already passed, so it is time for an official™ update on the development of Gatekeeper.
I have been able to work a couple of hours each day on the project and I’m loving it! It has been pretty cool so far to learn Godot as it is pretty beginner-friendly on how to make things.
The first few days I dedicated to go through some tutorials to learn the basics of Godot.
After I felt I knew the bare minimum to start programming this game, I jumped directly into it. The first task was to create a placeholder for the most important element of the game… the Gate.
Tasks
Gate placeholder
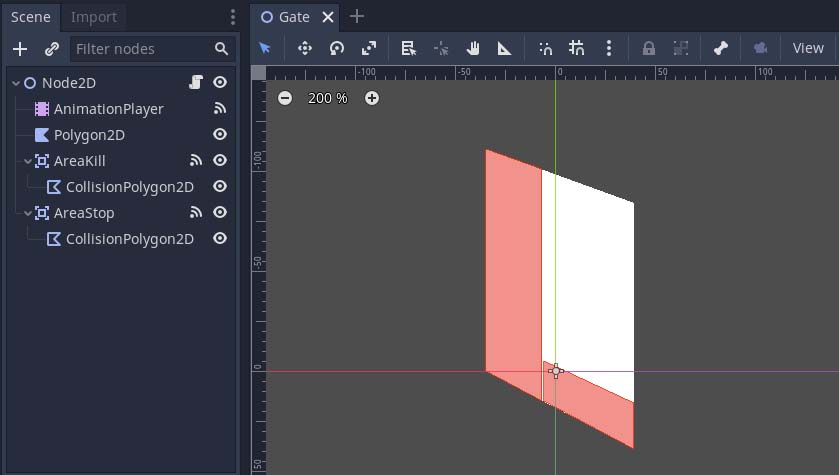
I started by mocking up an isometric shape, since I thought it would give more depth and character to the gate than a simple 2D side-view. I immediatelly put my hands on creating a raise and lower animations that felt somewhat convincing. This was pretty easy to do, thanks to the usage of Ease functions on Godot animations.
Afterwards, I decided that the gate would have two collision areas:
- a side one, which would behave like a wall to stop mobs;
- a bottom one, which would behave like the area with spikes that will kill the enemies.
In the end, I ended up with the best gate I have ever made in my life. Behold!
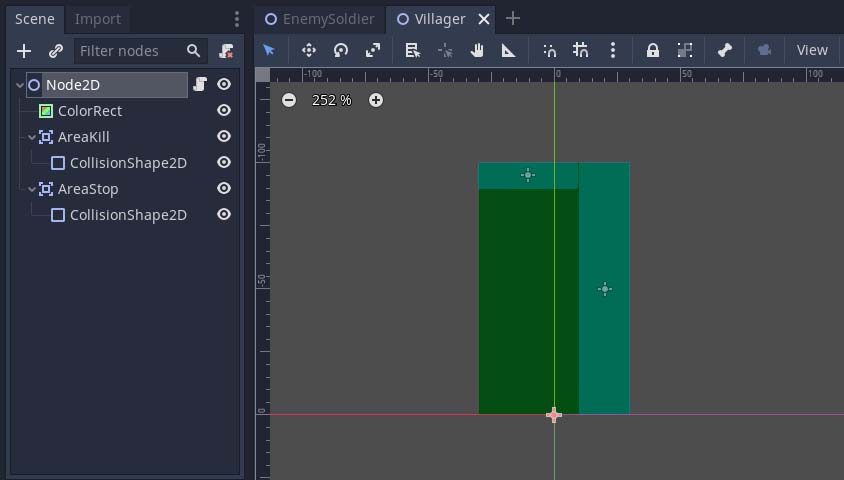
Mobs placeholder
Having extensive experience developing Gate placeholders made creating the mobs placeholder very easy. Mobs also have two collision areas:
- one for stopping when they reach the closed gate;
- another for detecting when they are being smashed by the gate.
Simple game loop
Now it was finally time to start gluing things together.
I created a basic Spawner script to randomly spawn villagers or enemies. These would walk automatically towards the Gate, and would either collide with it or pass through.
Collisions use four separate Physics Layers to detect which part of the mob collided with which part of the gate. Each collision with the gate triggers a separate area_entered() signal, depending if it collided with the side or the bottom part. A new signal is then emited to the colliding mob, telling them to “stop” or “die”. If the gate raises then they are no longer colliding, so a “move” signal is emited from the Gate to the mob.
A corresponding Despawner script was also added to make sure the mobs can graciously be terminated once they leave the screen.
You can see it all in action below.
Villagers are green,
EnemySoliders are red,
don’t walk near a falling gate,
or you will end up dead!
Until next week…
These are the tasks that I will attempt to work on for the following week:
Winning / Losing conditions
Having already a basic game loop, my next task will be implementing the core losing/winning conditions for the game. My current concept is to award points whenever the player kills an enemy or lets a villager through, and deduct points otherwise.
I also though about relating the spawning/movement rate of the mobs and movement speed of the gate with the overall success rate of the player. The better the player, the faster the game gets, the more points are available to earn.
After a set amount of time, the game ends, and the player receives its final score.
Game art
Now, this is where my vulnerabilities start. Let me begin by assuring you that I was never good at drawing. I don’t even consider myself mediocre. I consciously avoided any kind of arts and crafts project since I was a kid.
I already got some motivation by watching a great video of another fellow game developer. Make sure to follow him, because he works on really cool stuff.
With that in mind, I’ll give it my absolute best.
I’ll see you again in about a week, with another development update.